Living in the Cambridgeshire area, we have fantastic dog walks around our lovely countryside. We have a dirt track just across the road from where we live.
Perfect right? It means our lovely living room carpet was being ruined when we had a day of rain, and my husband was getting fed up with being moaned at about the cleaning of my carpet.
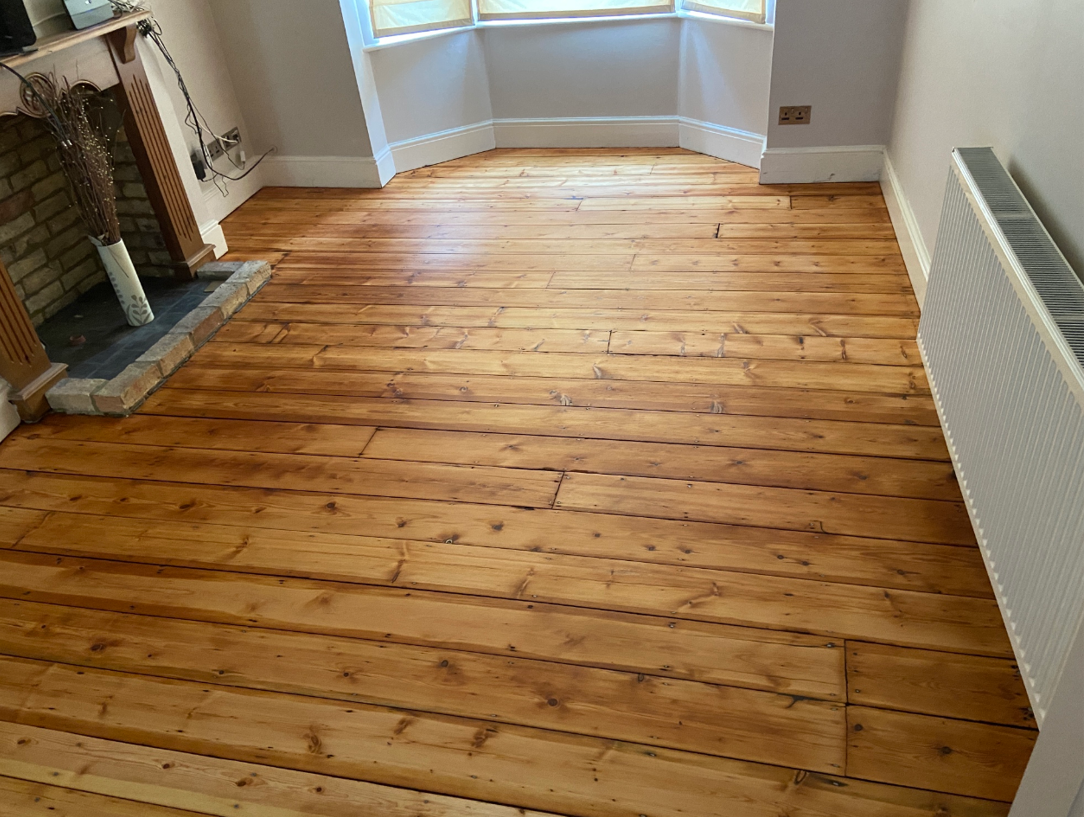
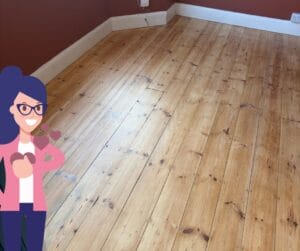
Because of this, he suggested we think about taking the carpet up and sanding our living room floor.
I don’t think he thought about what it would take before starting or how much mess he would make…
So, as I work alongside another company that does this, I investigated it further with my colleague and let me tell you, it doesn’t look easy!
I decided that there must be others who would like to do it themselves, so while I educate myself, I shall educate us all.
This post will cover:
- Has your floor been covered with carpet?
- How do I know what type of hardwood floor I have?
- How to prep my room
- Different types of sanders
- How do I sand my hardwood floor?
So, without further ado…
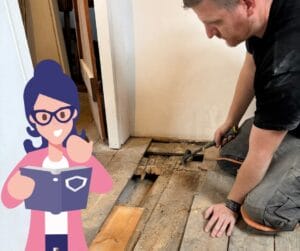
1. Has your floor been covered with a carpet?
Why I hear you ask?
This being ignored could end with a splinter in my puppy’s paw and a costly trip to the vet.
Did you know that no nails and nails that are used to keep the carpet down can cause the plank to split when you’re taking the carpet up?
As we have a dog, we will make sure this is looked at very well before starting!
(I don’t personally want a splinter in my toe either)
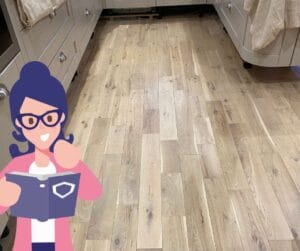
2. How do I know what type of hardwood floor I have?
Making this decision is more complicated than it looks, but I’m going to try and help you decide.
The hardest part is deciding if it is a solid, engineered hardwood floor or laminate.
Some hardwood floors, like laminate, can’t be sanded or refinished, so always try a small hidden area first, somewhere you really won’t see.
- Look at the floor closely.
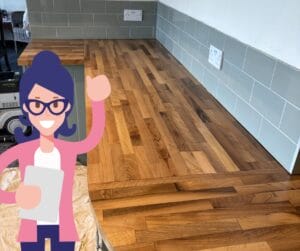
The grain will never be the same if it’s a solid or engineered hardwood floor.
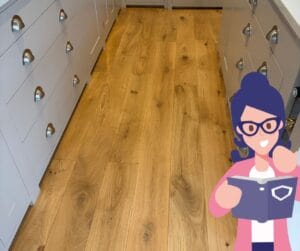
Laminate is factory-made, so you will generally get the same pattern.
It would be best to remember that the higher-end laminate floors will have the same pattern but not be so noticeable.
You may find the knots easier to tell if this is the case. They will typically be very similar to each other.
Always check a large area and call that professional out if in doubt!
- Check for damage.
Again, this isn’t a foolproof way of deciding. However, if you see any scratches and dents, it generally means it’s a natural floor.
They usually mark more than laminate, but laminate does scratch, so if you don’t know… Yep, you got it. Call the professionals!
- Are there any watermarks?
Laminate doesn’t stain the same way hardwood flooring does.
If you see water rings or areas of discolouration, this is more likely to be a hardwood floor.
- How are the floorboards attached?
You’re looking for staple or nail holes for hardwood floors but glued on laminate.
- Look near the radiator to find the thickness.
Hardwood floors are thicker than laminate, which will make a big difference when you sand them.
Engineered will typically be between 7mm to 12mm.
Hardwood floors usually start from 12mm up to 20mm.
So, as you can see, before even beginning the sanding process, you have a lot to do.
3. How to prep your room
Move all the furniture out of the room, so your floor space is empty.
Once this is done, sweep and hoover the whole floor before wiping or moping with a slightly damp cloth or mop.
When you hoover, make sure you do the edges. My husband never seems to manage this, and as I must remind him, I’m reminding you too!
At this point, no one else can enter the room.
The worst thing is that you get a bit of grit in your pad disc or belt and leave a nice gauge on your floor.
Next, go around your floor on your hands and knees. Yes, you did read that right.
Go around on your hands and knees, and with your hand and eyes, make sure no nail heads are sticking up and no grit to cause problems with your sander.
If you’ve done all this and you’re convinced the floor is ready, time to get your sander.
While you’re renting the sander, I advise thinking about your safety.
You will need:
- Ear protection – Trust me, it’s loud.
- Gloves – Keep away splinters and blisters.
- Eye protection – You want to be able to see your finished work.
- Suitable facemask – Otherwise, you can block your sinuses with varnish fumes or dust. Remembering some hardwood dust can be toxic.
If this hasn’t put you off, the next step Is to start sanding.
This next step will become your nightmare, mainly because renting your sanding machine brings you more questions as there are different types of sanders too.
I know. Just as you thought, you would be able to jump into the sanding bit with ease.
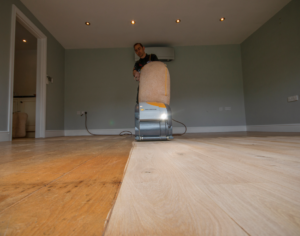
4. Different types of sanders
Floor sanding machines are powerful tools designed to sand off the top surface of wooden floors. There are three main types of floor sanding machines: drum sanders, orbital sanders, and edgers.
- Drum Sanders: Drum sanders are heavy-duty machines excellent for large, flat surfaces. They use a rotating drum wrapped with sandpaper to remove the top surface quickly.
- Orbital Sanders: Orbital sanders are less aggressive and suitable for fine sanding and polishing. They use a round pad that moves in small orbits, making them ideal for areas that require a gentler touch.
- Edgers: Edgers are smaller machines designed for sanding corners, edges, and hard-to-reach areas. They have a spinning disc that sands the floor surface.
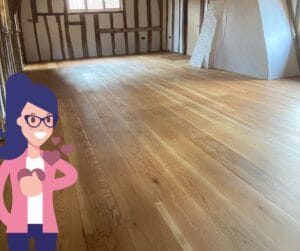
5. How do I sand my hardwood floor?
I’m tempted to tell him no, look at what my colleagues do!
But I know you may all like to have a go, so the following will hopefully help with your next step.
Sanding is always done in stages of grit size.
You generally start with 35grit to 40grit, then 60grit, then 80 grit, then 100grit and lastly 120grit.
You can always use a 180grit and 220 grit if you have a thick floor. With these sizes, if you don’t know, don’t!
The first tip is that you will always sand with the grain.
The second tip is to look around at the floor after each stage to ensure you haven’t missed marks from the stage before.
If you miss a stage, the next one will be harder to do and won’t leave an even finish.
The only stage you should skip is the choice of which grit size to use.
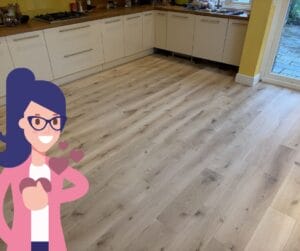
On a newer, uniformed floor, you may start with a 60grit.
The reason to not skip stages is that if you choose to stain, the stain will show all the mistakes. And, if you have a wife like me, she will be nag at you for an eternity!
After all the stages of sanding, it’s time to join the beloved Freddie Mercury and get the hoover out again, or broom, your choice!
(I mean, I even suggest doing it to the song. Get you in the mood!)
With or without Freddie, always make sure you hoover or sweep with soft brushes and go with the grain again to avoid any marks.
Once you have as much dust-up as possible, make sure that any nail heads showing are either knocked down or removed. We do this, so it doesn’t stain in the future.
Now you’re ready for your new hardwood floor finish. Always use a durable one, especially if you have a lot of traffic.
So, there you go.
I know it’s a lot of hard work, and a lot can go wrong…
So, if you decide against it, after reading all this, you will appreciate the professional you ask to do it, Hehe!!
Jokes aside, doing this yourself is very satisfying.
My husband was so proud when he tiled our kitchen floor, and I can only assume he will feel the same when he sands the living room.
For further advice or information on our Carpet and Soft Furnishing care, please do not hesitate to contact the Art of Clean team on 01223 901649 in Cambridge. Our services include Carpet Cleaning, Upholstery Cleaning, oriental and area Rug Cleaning, Curtain Cleaning, Patio and Driveway Pressure washing, Leather Cleaning, Stone and Tile Floor Cleaning and Wood Floor Sanding and Restoration. We also supply new flooring and carpets through our sister company Art of Flooring. Our Dry-Cleaning service is provided by Farthings Cambridge.
What to look for when choosing a floor cleaning or restoration company