Hello everyone! For this blog about “pine parquet floor restoration in Linton,” I decided there couldn’t be better people than the team themselves. So, I took some notes from the video we had made and our fabulous Operations Manager, Joao, at Art of Clean.
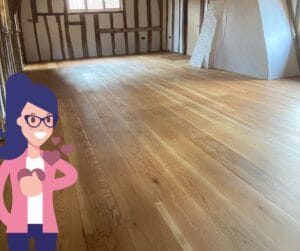
Joao and Craig recently embarked on a community project at the Free Church in Linton, restoring a heavily used pine parquet wood floor in their hall. The community use the space for various activities, including Scout meetings, art groups, and mother-and-toddler sessions. As a result, the floor had suffered a fair amount of wear over time.
While we’re pleased to contribute to the community, the focus of this blog is to delve into the technical side of restoring pine parquet wood floors. By doing this, we aim to give you the knowledge to transform your aged or scuffed wood floor into a thing of beauty once more.
If you want to read more about the community project and why we did it, you can check out our other blog by clicking here: Linton Free Church: Wood Floor Restoration Community Project. You can watch the lovely video about what we did, why and how it turned out!
Identifying the Type of Wood and Pattern
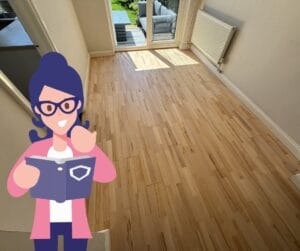
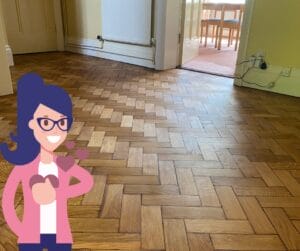
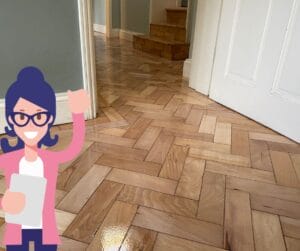
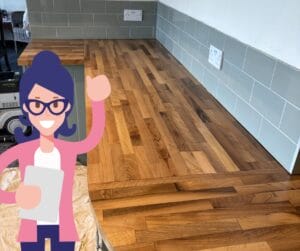
Before you even touch a sander, it’s crucial to identify the type of wood and pattern. In our case, at the Free Church, the floor was pine arranged in a herringbone pattern. Pine is a softwood, so it requires a specific type of sanding to prevent damage to the wood.
Materials and Tools Required
- Sanding Machines (belt sander, edge sander)
- Sandpaper (various grits from coarse to fine)
- Vacuum cleaner
- Commercial grade, water-based lacquer (We use Pallmann’s Products)
- Paint rollers and brushes
- Safety equipment (gloves, goggles, masks, overshoes)
The Restoration Process
- Preparation
Before you start, remove all furniture and cover any openings to prevent dust from spreading. Ensure to wear all safety gear to protect yourself from wood dust and chemicals.
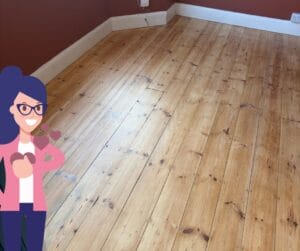
- Coarse Sanding
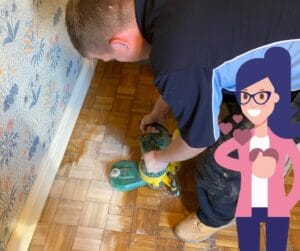
Using a belt sander, begin the sanding process with coarse-grit sandpaper (around 40-60 grit). The goal here is to remove the old finish and any imperfections on the surface. For pine, especially, be careful not to press too hard, as this could result in unwanted gouges.
- Edge Sanding
Use an edge sander with the same grit level as in the previous step for corners and areas close to the walls.
- Vacuum
After the initial sanding, vacuum the floor to remove any lingering dust particles. This step will make it easier to see any areas needing additional sanding.
- Fine Sanding
Switch to a finer grit sandpaper (80-100 grit) for the second round of sanding. This sanding step will smooth out any rough areas and prepare the wood for the finishing touches.
- Final Vacuum and Clean-Up
Vacuum the floor again and go over with a damp cloth to prepare it for the finish.
- Primer time
Joao and Craig worked together to add the primer, starting at the far ends to each other and meeting in the middle. It was like watching a finely timed choreography. (I was honoured to finally watch our wood team in action.)
Once they applied this to the whole hall, they left it for a few hours to dry before the final process… The protection!
- Finishing
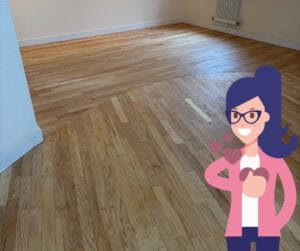
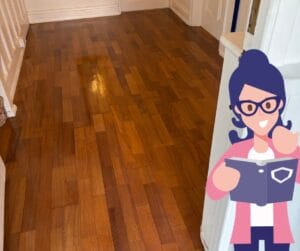
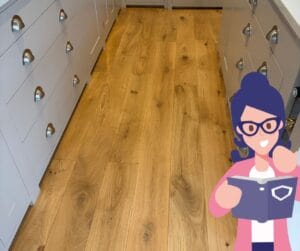
We used a commercial-grade, water-based lacquer for the finish. It has a very low solvent level, making it environmentally friendly. The product we used was our all-time go-to, Pallmann’s Pall-X Zero. Pallmann formulated this lacquer, especially for heavy-wear locations. We applied it with a roller to ensure a matte, hard-wearing finish by including a hardener in the mixture.
They did this twice to ensure we protected the floor as much as possible!
Some Things to Think About
There are many other factors in floor sanding! I learned that everything does have to be suitable to complete the finishing process.
- You should fill all joints if necessary.
- Sand to an appropriate standard for the timber.
- The floor should be dust-free from contamination and dust.
- The room and floor temperature should be between 18-24 degrees, the wood’s moisture should be 7-11%, and the humidity should be between 35 and 65%.
- They do recommend that you have gentle air movement, but you should avoid excessive or no ventilation.
Wrapping Up
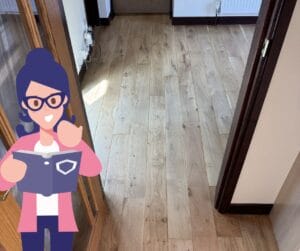
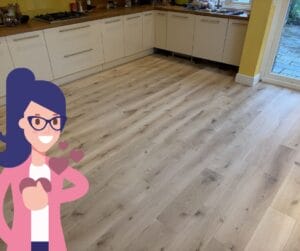
By using commercial-grade, environmentally friendly products, we can ensure that the floor will be long-lasting and sustainable. It also allows places like the Free Church in Linton to keep serving their communities without resorting to less sustainable options like sending good wood to landfills.
Through our experience, we learned that pine parquet floors, despite showing signs of wear and tear, can be beautifully restored to serve communities for many years.
I hope this guide has been helpful for those considering a similar project, and as always, we are here to offer our expertise for any of your flooring needs.
Thank you for reading!
You can find Floor Sanding Companies in and around Cambridge Here:

Written by Tracey Gilbey, Marketing
For further advice or information on our Carpet and Soft Furnishing care, please don’t hesitate to contact the Art of Clean team on 01223 901549 in Cambridge. Our services include Carpet Cleaning, Upholstery Cleaning, oriental and area Rug Cleaning, Curtain Cleaning, Patio and Driveway Pressure washing, Leather Cleaning, Stone and Tile Floor Cleaning and Wood Floor Sanding and Restoration. We also supply new flooring and carpets through our sister company Art of Flooring. Farthings Cambridge provides our Dry Cleaning service.